A few months back Microsoft released an update to their Spec Explorer tool for developing model based tests, which can be downloaded from the Visual Studio Gallery page. The new version contains several bugfixes as described on http://msdn.microsoft.com/en-us/library/hh781546.aspx, but first and foremost Visual Studio 2012 is now supported and not least this release shows that Spec Explorer is still being actively developed by Microsoft.
This tutorial/getting started guide covers some of the experiences I’ve got from my use of Spec Explorer for some projects over the last couple of years. Primarily this post will focus on
- Structuring your model project
- Building models in C# (rather than cord scripts)
- Limiting model state space
- Separating model implementation (adapter) from system under test
- Validating model state using Checker pattern
- Building and executing tests from model
This tutorial uses Visual Studio 2012, but should be applicable to Visual Studio 2010 as well.
Downloading the files
The files used for this tutorial are available at https://github.com/rasmusselsmark/StackMBT
Modeling a simple stack
For the tutorial, I’ve chosen to model a stack, with the following actions:
Probably a lot simpler than the system your'e usually developing/testing, but nevertheless a stack serves as a good example of getting introduced to Spec Explorer, and actually does show some of the challenges related to modeling a software system. And one of my most primary rules when modeling a system is to start simple, which certainly holds true for a stack.
In short a stack is a data type, that only allows to access data at the “top“, e.g. like a pile of books where you are only allowed to take the top-most book.
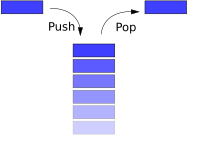
Image from http://en.wikipedia.org/wiki/Stack_(abstract_data_type)
A typical use for the stack in software is the Undo feature, known from almost any program where the user can type in data. The model built during this tutorial will look like this, limited to max 5 elements in the stack.

Create new Spec Explorer project
Create a new Spec Explorer project in Visual Studio, by selecting File->New->Project… Select default values, except disable “Sample System Under Test Project” on last page of the project wizard:


Structure of modeling solution
For this tutorial (and my modeling projects in general), I use the following project structure. Compared to default naming, you should change “StackMBT” (or whichever name you chose for the solution) to “StackMBT.Models” and also update Default namespace for project as well.
Your solution structure should look like the following:

Building the model
In this tutorial, I’m using only C# to define the model, i.e. define actions and transitions. It’s also possible to define transitions using the cord scripting language, but I find that using C# is better for the following reasons:
- Easier to understand for people not used to using Spec Explorer
- Possible to unit test your models (will come back to this later in a later blog post)
The Cord script
Update the Config.cord file in StackMBT.Models project to contain the following code:
// A simple stack model using C# model definitions

config Main
{
    // Use all actions from implementation (adapter) class
    action all StackMBT.Implementations.StackImplementation;

    switch StepBound = none;
    switch PathDepthBound = none;
    switch StateBound = 250;

    switch TestClassBase = "vs";
    switch GeneratedTestPath = "..\\StackMBT.TestSuites";
    switch GeneratedTestNamespace = "StackMBT.TestSuites";
    switch TestEnabled = false;
    switch ForExploration = false;
}

// Model for simulating simple stack operations
machine StackModel() : Main where ForExploration = true
{
    construct model program from Main
    where scope = "StackMBT.Models.StackModel"
}
Without going into details on Cord scripts here (see http://msdn.microsoft.com/en-us/library/ee620419.aspx for the MSDN pages on Cord), the two most important elements in the above Cord script are “action all StackMBT.Implementations.StackImplementation;” which says that we should use all actions defined in the C# class StackMBT.Implementations.StackImplementation and the “machine StackModel()” section defines which C# class is used for building the model.
C# model class and state data structure
Add a class with filename StackModel.cs to the StackMBT.Models project. This class will contain the logic for building the model, namely the actions which each describes the conditions required for this action to execute, i.e. for which states the action is applicable.
First, make sure you have
using Microsoft.Modeling;
as part of using statements for the class, as this namespace contains the classes used for describing the model, most importantly the Condition class and the data structures like Sequence<>, which we will use in this tutorial to model a stack.
First of all let’s define the class using
namespace StackMBT.Models
{
    public static class StackModel
    {
Note that the Spec Explorer framework requires you to declare the model class as static. This design choice in Spec Explorer is quite unfortunate I would say, as it makes it e.g. harder to extend models, but in a later blog post, I’ll get back to how we can extend models even with static classes.
Normally you don’t need to declare the model class as public, but I’m doing it in order to be able to unit test the model, i.e. writing tests to verify behavior of the model actions. Writing unit tests for your model class will be covered in a later blog post.
Our model needs to keep track of it’s internal state, for which I implement a specific class (actually a struct). Although the state for this model is quite simple, and we simply could have the stack represented directly in the model class, there are a number of advances related to having it separate, mostly related to reusing state in unit tests as well as implementation (adapter) class.
The StackModelState is declared as follows in the StackMBT.Implementation project (since we’re going to reuse it from our adapter and tests later on):
public struct StackModelState
{
    public Sequence<int> Stack;

    public override string ToString()
    {
        // …
    }
}
Two important things in relation to the state data structure are:
- StackModelState is implemented as a struct
- Microsoft.Modeling.Sequence<> is used for representing stack, rather than using the built-in System.Collections.Generic.Stack<> class
When exploring outcome for a model, Spec Explorer needs to determine which states in the model are equal (otherwise the exploration would generate a tree). Based on the page Using Structs, CompoundValues, and Classes on MSDN I’ve found it easiest to use immutable collections as well as structs for representing model state. Spec Explorer provides the following immutable set/collections, which can be used when developing models:
| Spec Explorer set |
Description |
Corresponding .NET class |
| Microsoft.Modeling.Map<> |
Unordered collection mapping keys to elements |
System.Collections.Generic.Dictionary<> |
| Microsoft.Modeling.Sequence<> |
Ordered collection of elements |
System.Collections.Generic.List<> |
| Microsoft.Modeling.Set<> |
Unordered collection of elements without repetitions |
Probably a custom implementation of List<> gets closest |
In the model class, we instantiate the model state in the following field:
// Model state
public static StackModelState ModelState = new StackModelState() {Stack = new Sequence<int>()};
Unfortunately a downside here is that we have to remember to initialize the internal state fields as well, as we cannot rely on a constructor for our struct.
Now that we have the model state declared, we’re ready to move on to defining an action, for which Pop() is the simplest, as it simply has to throw away the first element on the stack (we don’t care about the value of the element right now).
[Rule]
public static void Pop()
{
    Condition.IsTrue(ModelState.Stack.Count > 0);
    ModelState.Stack = ModelState.Stack.RemoveAt(0);
}
Note the Rule attribute applied to the method, which tells Spec Explorer that this is an action/transition. The condition says that we can only pop elements from the stack, if it’s non-empty. Since the Sequence<> type used for representing the stack is immutable, we need to assign it to the stack in the second line of the Pop() method above. If we didn’t assign it, the state simply wouldn’t change.
Now we can also implement the two remaining actions:
[Rule]
public static void Push([Domain("PushValue")] int x)
{
    ModelState.Stack = ModelState.Stack.Insert(0, x);
}

[Rule]
public static void Clear()
{
    Condition.IsTrue(ModelState.Stack.Count > 0);

    while (ModelState.Stack.Count > 0)
    {
        ModelState.Stack = ModelState.Stack.RemoveAt(0);
    }
}
For the Push() action we have declared a parameter, which defines which value is pushed onto the stack. By using a the Domain attribute here, we can declare a method which defines possible values for the argument:
public static IEnumerable<int> PushValue()
{
    return new int[] { ModelState.Stack.Count };
}
This simply means that we will push the numbers [0,1,2,3,…] onto the stack in that order. If returning a set of multiple numbers, Spec Explorer could pick any one of this numbers during exploration of the model.
Limiting state space
In the actions above, only Pop and Clear methods have set a condition, that these actions should only execute when the stack is non-empty, otherwise these operations aren't applicable. We need to set an "upper limit" as well for in order to control the resulting modeling space when exploring the model. This can be achieved by implementing a method decorated with the StateFilter attribute, which tells spec explorer that this method is used to "filter" the model.
[StateFilter]
static bool Filter()
{
    return (ModelState.Stack.Count <= 5);
}
This will stop exploration of the model, when we reach 5 elements in the stack.
Connecting the model to our system under test using implementation class (adapter)
Before we are able to actually able to visualize/explore our model, we need to implement the adapter, as shown in the following figure taken from http://blogs.msdn.com/b/specexplorer/archive/2009/11/23/connecting-your-tests-to-an-implementation.aspx:

In the Config.cord file we specified that actions are defined in the class StackMBT.Implementations.StackImplementation:
action all StackMBT.Implementations.StackImplementation;
The full content of this file is as follows:
using System;
using System.Collections.Generic;
using System.Text;

namespace StackMBT.Implementations
{
    public static class StackImplementation
    {
        // Our "System under test" stack
        private static Stack<int> stack = new Stack<int>();

        public static void Push(int x)
        {
            stack.Push(x);
        }

        public static void Pop()
        {
            stack.Pop();
        }

        public static void Clear()
        {
            stack.Clear();
        }
    }
}
In this case we’re actually using the System.Collections.Generic.Stack<> class, as this is the system under test for our model.
Visualizing the model
We have now implemented all necessary parts in order to visualize/explore the model. Open the “Exploration Manager” tab (or select Spec Explorer->Exploration Manager menu), right click and select "Explore":

This should produce the following visualization of our model space:

By exploring the model using Spec Explorer, we can visually verify that we have modeled the SUT correctly, i.e. not having invalid transitions in the model. For this simple model, it’s easy to verify, but models can quickly become too big to be verified visually. In these cases it’s important to start simple, and verify that the basic model is as expected, before adding new actions.
When clicking on the states in the model/graph, you can use the State Browser window to verify that the model state is as expected when navigating through the model.

In the above example, I have selected the S9 state in the model, for which the stack should contain the elements [2,1,0]
Comparing model states
Another powerful feature of Spec Explorer is the ability to visually compare states in the model. Click on e.g. state S6, to select it, and then afterwards right-click on S9 and the select menu item "Compare with selected state":

This will then show a visual diff between states S6 and S9.

In this case we can see that an extra element #2 has been added to state S9.
Verifying model state using the Checker pattern
Before generating tests based on the model, we need to implement validation of expected model state, by using the State Checker Pattern. This adds an extra action for each state in the model, where we can verify that the state of system under test is as expected from our model, i.e. our stack contains the expected element.
To implement the Checker pattern, add the following rule to StackModel.cs class:
[Rule]
static void Checker(StackModelState state)
{
    Condition.IsTrue(state.Equals(ModelState));
}
as well as the following two metods in StackImplementation.cs:
public static void Checker(StackModelState state)
{
    Assert.AreEqual(state.Stack.Count, stack.Count, "Not same number of elements in stack");

    string expected = ArrayToString(state.Stack.ToArray());
    string actual = ArrayToString(stack.ToArray());

    Assert.AreEqual(expected, actual, "Array elements not equal");
}

private static string ArrayToString<T>(T[] array)
{
    var text = new StringBuilder();
    text.Append("[");

    for (int i = 0; i < array.Length; i++)
    {
        if (i != 0)
            text.Append(",");

        text.Append(array[i].ToString());
    }
    text.Append("]");

    return text.ToString();
}
When exploring model now, you should get the following visualization, where we have the new Checker action applied to each state, showing what the expected state of the stack is at the given node in the graph:

Generate and execute test cases
One of the strengths of modeling tests, is the ability to have the tool, in this case Spec Explorer, generate test cases based on the model. To do this we simply add the following declaration to the Cord.config file:
machine StackTestSuite() : Main where ForExploration = true, TestEnabled = true
{
    construct test cases
    where strategy = "ShortTests"
    for StackModel()
}
What’s important here is “TestEnabled = true”, which tells SpecExplorer that this machine allows tests to be generated from it using the “ShortTests” strategy for generating tests. Either “ShortTests” or “LongTests” strategies are possible as described on http://msdn.microsoft.com/en-us/library/ee620427.aspx.
In the Exploration Manager window, the new machine “StackTestSuite” is now available.

Click “Explore” to see the test cases that Spec Explorer will generate for our model:

Finally generate the actual C# tests, by choosing “Generate Test Code” in Exploration Manager, which can then be executed as any regular test from Visual Studio (here using ReSharper):

By writing relatively little code, we were able to generate a model and 10 test-cases for our system, which is one of the strengths of model based testing. Also, if implementing a new action in the model, it's easy to generate new test-cases using the tool, without having to edit each test case.
This completes this Spec Explorer tutorial. In later posts I will follow up with some more practical examples of using Spec Explorer and model based testing for various parts of the Unity 3D game engine.
EDIT: As I've moved to a developer role within Unity, I unfortunately haven't had time to follow up on with the promised additional posts. My plan is still to use model based testing for testing the features we're working on (mostly back-end).